“Will the hard drive spin up?”
That was the question that haunted my thoughts.
You see, I bought an Apple IIGS back in the dim dark past of around 1987 – (a ROM version 01 without the Woz Limited edition signature) – and used it quite extensively for things like uni assignments, games, and attempting to write really amateur mod music. Over the years I souped it up with a TranswarpGS and a 100MB “Cutting Edge” brand SCSI hard drive. And it was good. And the FTA demos were awesome. And I did some programming and the hard drive got a decent work out.
But then I turned to the dark side and got a PC (486) in 1994. And lo, Star Wars X-Wing was awesome and the Second Reality demo by Future Crew was amazing. And my GS languished.
And then I got married in 1998, and the GS went into a box as I moved house.
And there it stayed.
And then got transferred to a new box with at least a plastic bag for lining.
And there it stayed.
And we moved houses a couple more times.
And the box moved.
And I occasionally worried about bit rot.
And it sat.
And sat.
And then after many years, and through various happenings, I went to WOzFest ///. And it was great!
And so after a few more WOzFests, WOzFest PR#6 came along, and its theme was preservation, and it was time at last to dig out the box! So I took it along.

On arrival, there were lots of projects on the go. There were plenty of people to help. At various times, Jeremy, Leslie, and Jon helped me out.

We were fairly methodical about trying things out.
First of all, after a quick look inside (motherboard was all good – no leakage from the original battery), I plugged in the computer, keyboard, mouse and monitor – no disk drives connected. The monitor power light came on – a good sign.
Next, we turned on the computer. Hmmm, no beep… oh wait, there’s the sound of the Transwarp GS whoosh. Excellent.
Hmmm, nothing on the screen. Leslie noticed I, being a doofus, hadn’t plugged in the monitor to the computer! Did that, but still nothing. Tried fiddling with the controls but no dice – no static charge on the screen. So there’s obviously something wrong with that – bummer. Although even 20 years ago it was getting a bit dodgy – slow to warm up and required taking the case off to adjust the focus. I might fiddle with that at a later stage. In the meantime, we hooked it up to Jeremy’s screen. And that worked!
So, successful startup of the computer.
Next was connecting up the disk drives. I had a standard 5.25″ drive, a Duodisk and a 3.5″. Tried out the standard drive first (there was a Wizardry disk still in it!) It spun but didn’t seem to attempt any reading. Leslie constructed a disk cleaner and we tried cleaning the heads but it still didn’t work.
So we tried the Duodisk, and that worked. Also tried the 3.5″ and it was fine.

We ran the self test (Open-Apple, Option, Reset) and everything checked out. One thing I confirmed is that the battery is dead. After changing a setting in the Control Panel and power cycling it, the setting was reset to default.
And now it was time to connect up the hard drive…
Scary.


I turned off the computer, connected the massive SCSI cable and switched on the hard drive (separate power back in those days). We heard it spin up! A good sign.
We turned on the computer and “Yes!” it started booting into GS/OS!
And then it crashed before it got to the desktop. Yikes. It seemed to be due to one desk accessory not loading properly.

So we tried resetting and holding down the shift key to load in safe mode (thanks to Jeremy et al for reminding me of all these things I used to know).
And it worked! We were in to the desktop!
And wow, there were all my files. And what the heck was I thinking when I created those partition names?
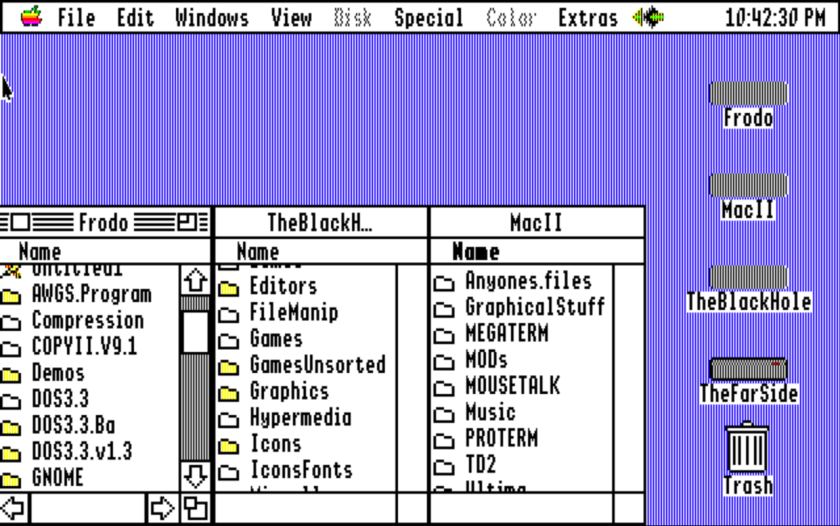
So we had a brief look around and then it was on to the next question – how can we make a disk image of these partitions?
It was time to whack in Sean’s CFFA3000 and a USB drive.

Without any battery to store the settings, we had to do some fiddling for the CFFA3000 to work properly because we couldn’t power cycle the GS.
After a few misguided attempts, we eventually struck on the right approach to imaging – just select “Import to disk image” and select the slot (7), partition (1-4) and the .po file name. It took about half an hour to do the first partition and when it was done, we tried setting that as the boot disk and booted it up. It all worked fine! Awesome.
So we went ahead and imaged the other 3 partitions. Over the course of imaging there were a total of 5 bad blocks. A little disappointing but not really that bad out of a total of 200,000!

And that took us to the end of the night. Thanks again to Jeremy, Leslie, and Jon.
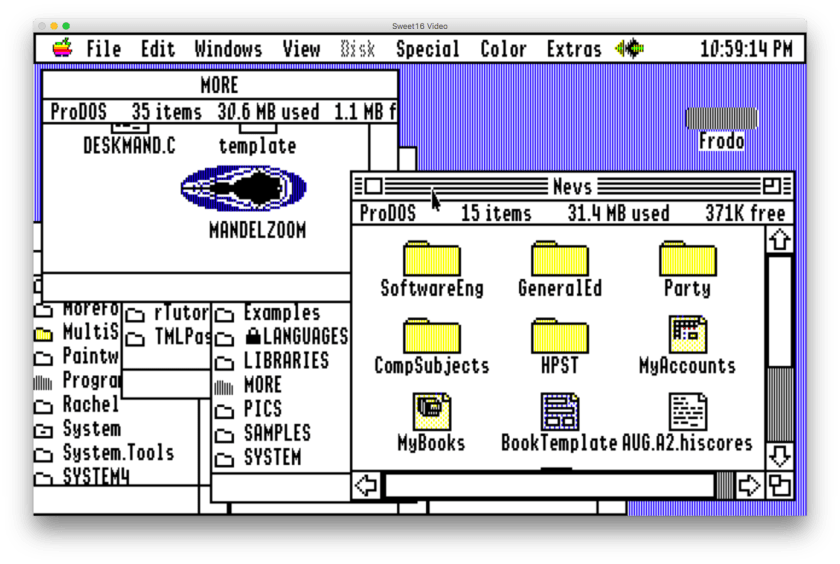
After coming home, I proceeded to get the disk images up and running under an emulator. After various attempts without success (because I was a bit clueless about what I was doing), I eventually got it working.
Basically, I used CiderPress to convert the disk image files to 2mg format and I was then able to mount them in Sweet16.
I had my old system back.
I’ve since had a lot of fun walking down memory lane looking at the files and documents on there, listening to old mods and I’ve even found some of my old code…
The programs I wrote are somewhat half-baked but usable and I plan on releasing them and putting the source on github. There’s a Mandelbrot generator, a really lame NDA demo, and the other’s a game that’s fairly complete and surprisingly playable. Stay tuned…
You must be logged in to post a comment.